More ways to pay: Apple Pay, Google Pay and bank transfers come to MPower checkout
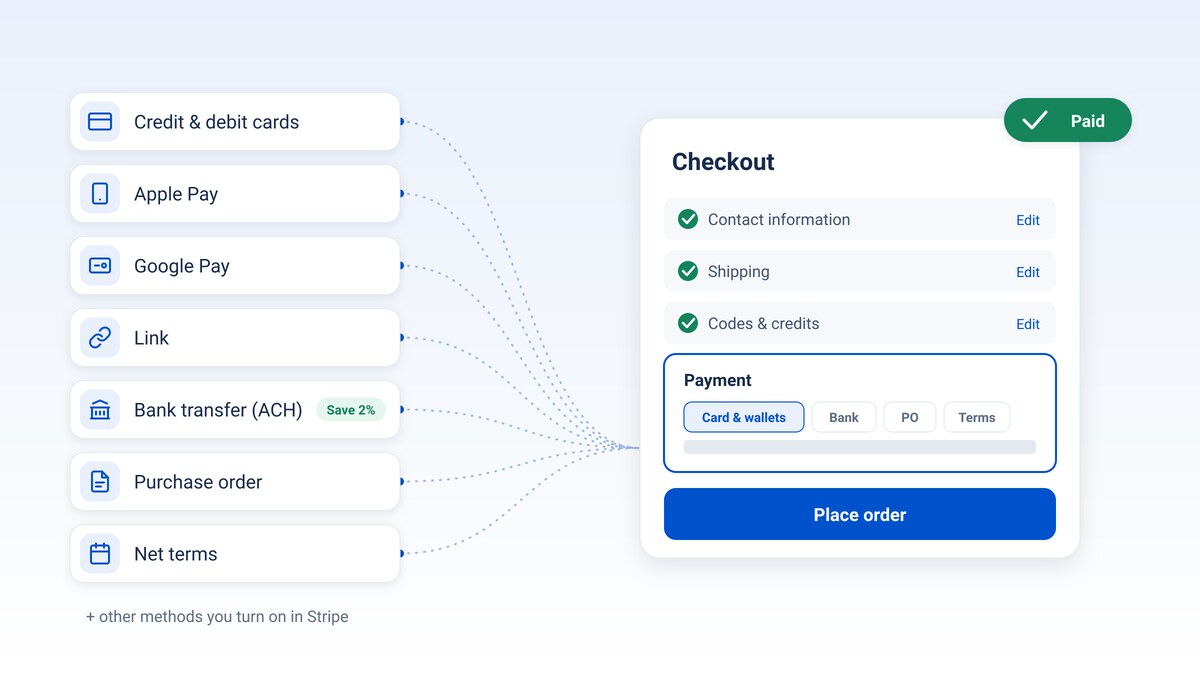
Your buyers don't all pay the same way. Some want to tap Apple Pay or Google Pay on their phone. Some would rather pay by bank transfer and skip card fees. Others need a purchase order or net terms. Advanced Checkout, MPower's new checkout component, brings all of them together on one Payment step, and you choose which ones each store offers.
Here's what's new, why it's worth switching, and how to turn it on for your store.
What Advanced Checkout does
Advanced Checkout replaces the original single long checkout form with a guided checkout on one page. Contact information, reference fields, shipping, codes and credits, and payment each open in turn. As the buyer finishes a section, it collapses to a one-line summary with an Edit link. The order summary stays beside the form, and on a phone it tucks into a drawer at the top of the page.
On the Payment step, buyers can choose:


Read the Advanced Checkout guide →
Why switch


How to set it up
Most stores can switch in about ten minutes.
1. Make sure your store uses Stripe. Advanced Checkout takes card and bank payments through Stripe. In your store, open Store Editor → Payments and confirm Stripe is the provider. Stores that use Authorize.net keep the original checkout for now. Connecting Stripe →
2. Turn on payment methods in Stripe. In your Stripe Dashboard, go to Settings → Payment methods and turn on Apple Pay, Google Pay and Link, plus anything else you want to offer. Enabling payment methods in Stripe →
3. Register your store's domains. Still in Stripe, go to Settings → Payment method domains and add every address your store uses, such as www.yourstore.com and yourstore.mpowerpromo.com. Apple Pay won't appear on a domain you haven't registered.
4. Add Advanced Checkout to your checkout page. In MPower, go to Store → Pages, open the Checkout page, remove the existing Checkout component and add Checkout Advanced. Save and publish. Your reference fields, codes, payment settings and shipping settings keep working.
5. Turn on bank payments (optional). In Store Editor → Payments, turn on Allow ACH payment and set an ACH Discount Percentage if you want to offer one. ACH Payment Discount →
6. Test it. Open your store on a phone, add something to the cart and check that Apple Pay or Google Pay shows on the Payment step.
You can also customize section titles, add short instructions under each section, and choose which contact fields are required or locked. All of these are in the component's settings. Configuration options →
What happens with a bank (ACH) payment
Bank payments don't clear instantly, so an ACH order moves a little differently from a card order:
- The buyer connects their bank. Buyers can usually log in to their bank and connect instantly. If that's not possible, Stripe sends two small test deposits and emails the buyer instructions to confirm them, usually within 1–2 business days.
- The order is placed as Pending Bank Verification. The buyer gets their order confirmation, and your team gets a Pending Bank Verification notification. The order doesn't move into production yet.
- Stripe confirms the payment. When the payment clears, MPower records it, moves the order to its normal status and runs your usual post-payment steps automatically. You don't need to do anything.
- If the payment doesn't go through, the order stays in Pending Bank Verification. Check those orders and reach out to the buyer to pay another way.
Bank verification and ACH details →
Want us to switch it for you?
Send us a service request with your store's name, and our team will set up Advanced Checkout and walk you through the Stripe settings only you can change.
You can also use Help → Submit a support request inside MPower.

